Keycloak provides a feature to enable login with various identity providers, including the solution combining Microsoft Entra ID (previously known as Azure Active Directory, Azure AD) plus Auth0 bundle.
Prerequisites:
In Microsoft Entra ID:
Sign in MS Azure portal.
Access Microsoft Entra ID.
Access App registration, click New registration.
Set:
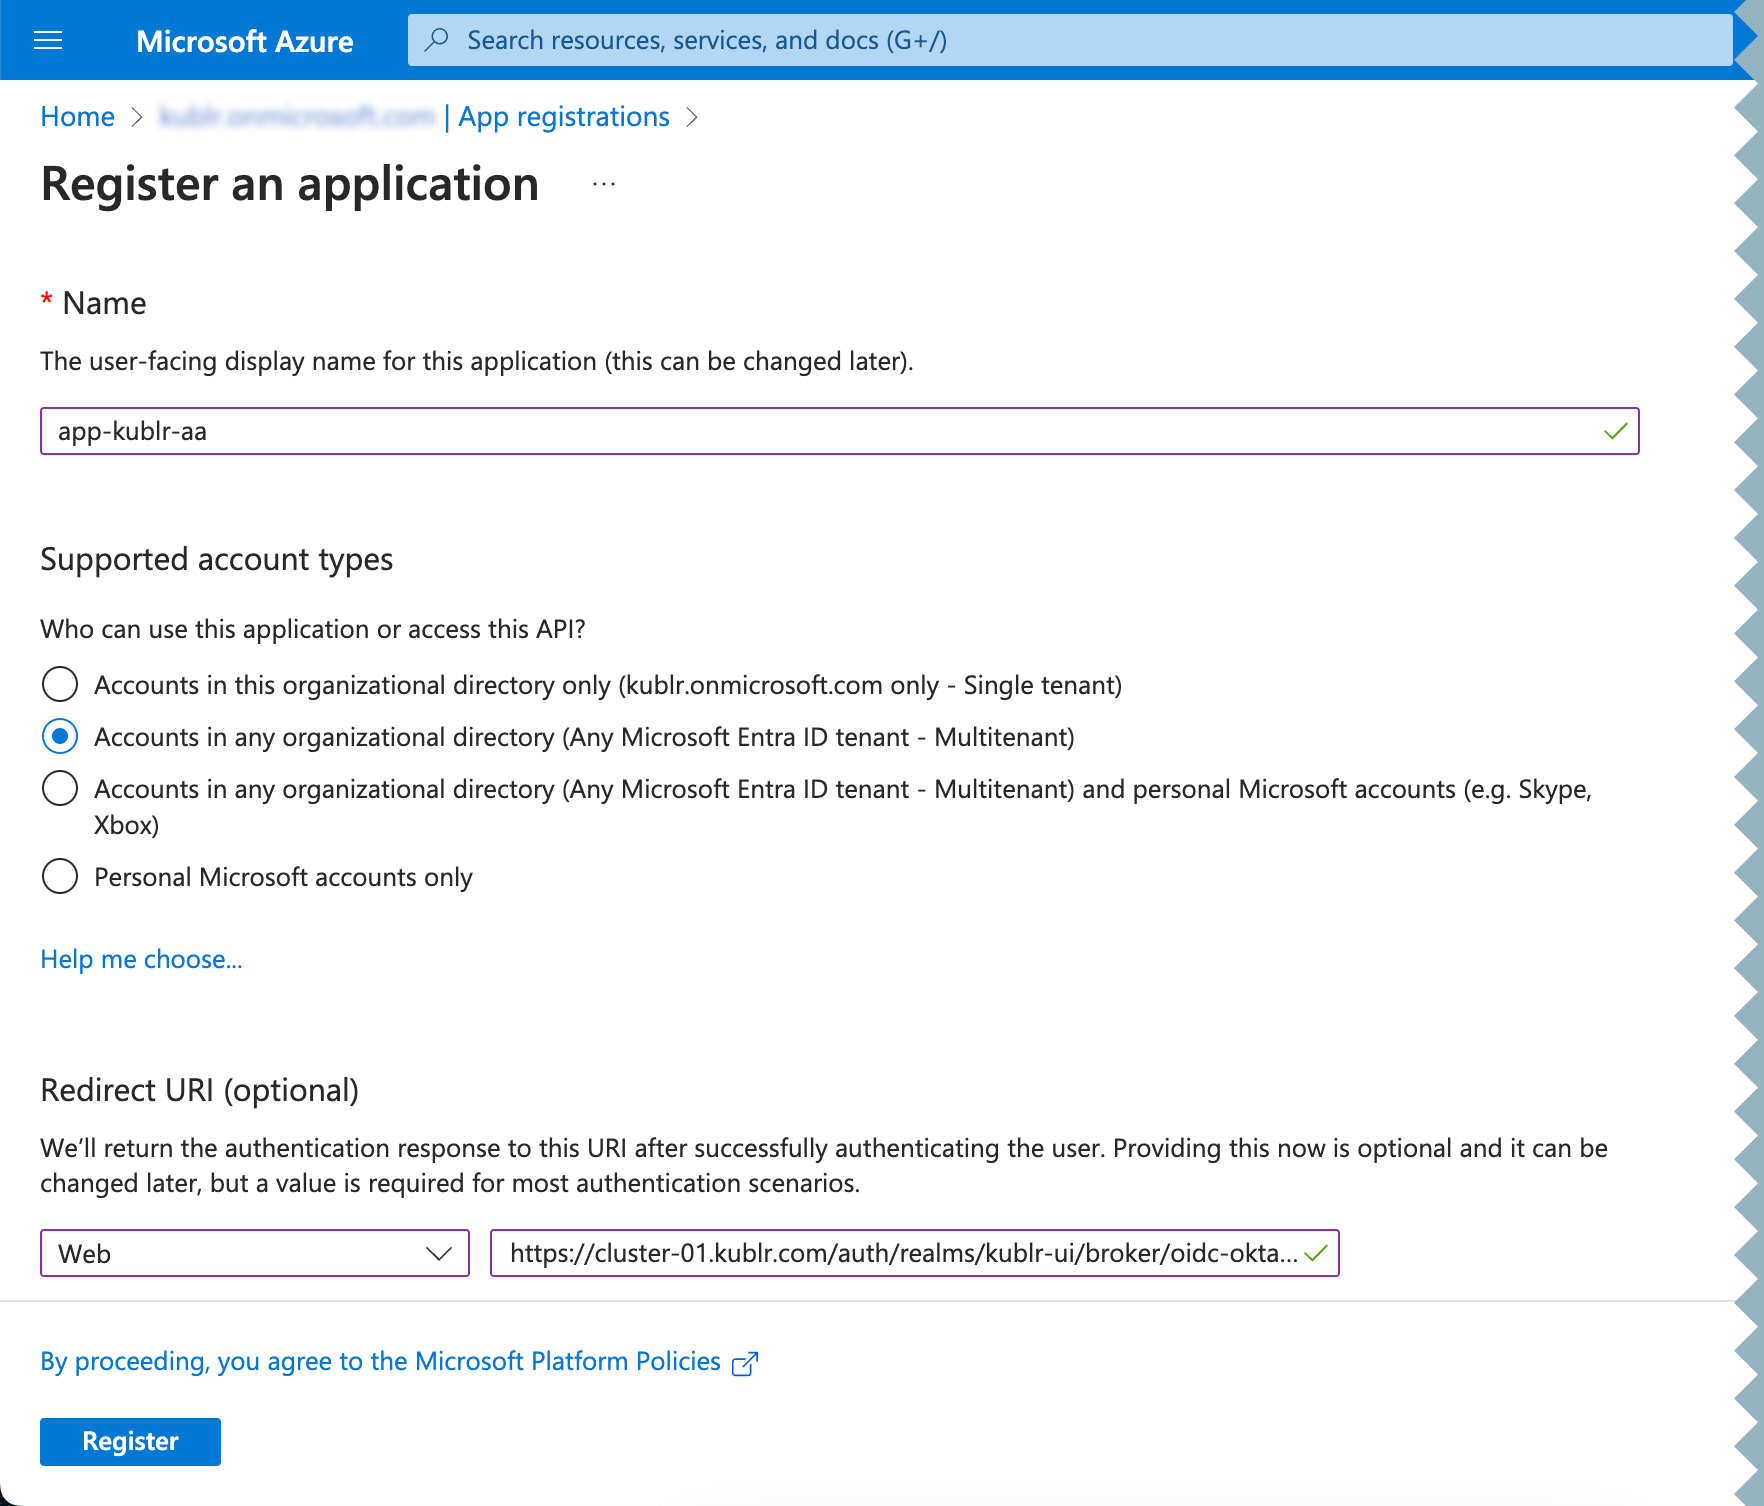
Register the app. Its page is displayed.
In Microsoft Entra ID:
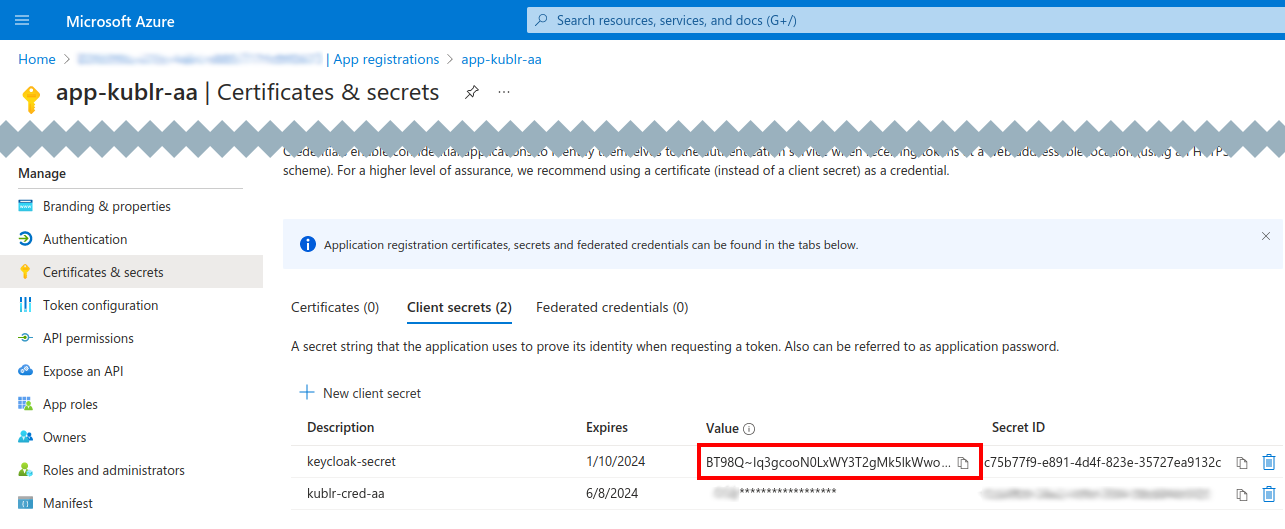
On your application page, access Certificates & secrets.
In Client secrets, click New client secret.
Set the secret description and expiration period, click Add.
Copy the value of the client secret. You will need this for the Keycloak configuration.
In Microsoft Entra ID:
At your application page, access API permissions.
Click Add a permission → Microsoft Graph → Delegated permissions.
Add the openid, profile, email, and any other required permissions.
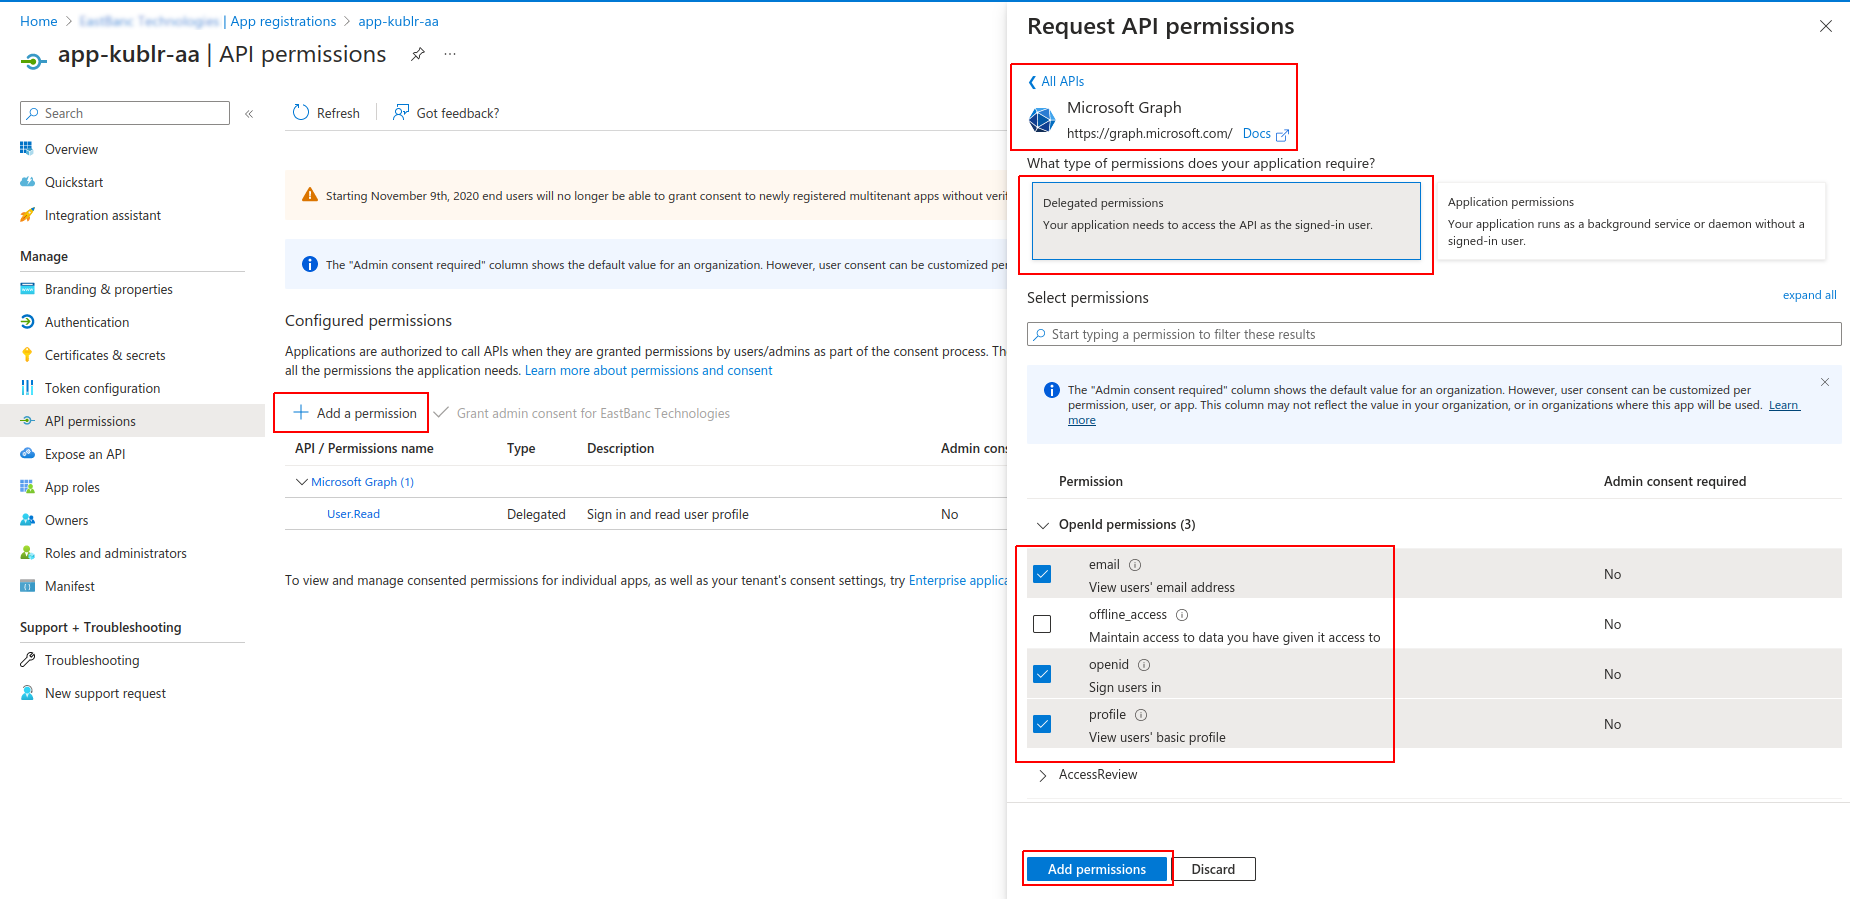
Click Add permissions.
On the Auth0 portal:
Sign in Auth0 portal.
Access Authentication → Enterprise → Microsoft Azure AD.
Click Create Connection.
Set:
Save changes.
At your connection page, access the Login Experience tab, then select the Display connection as a button option and click Save.
Using the left menu, access Applications → Applications.
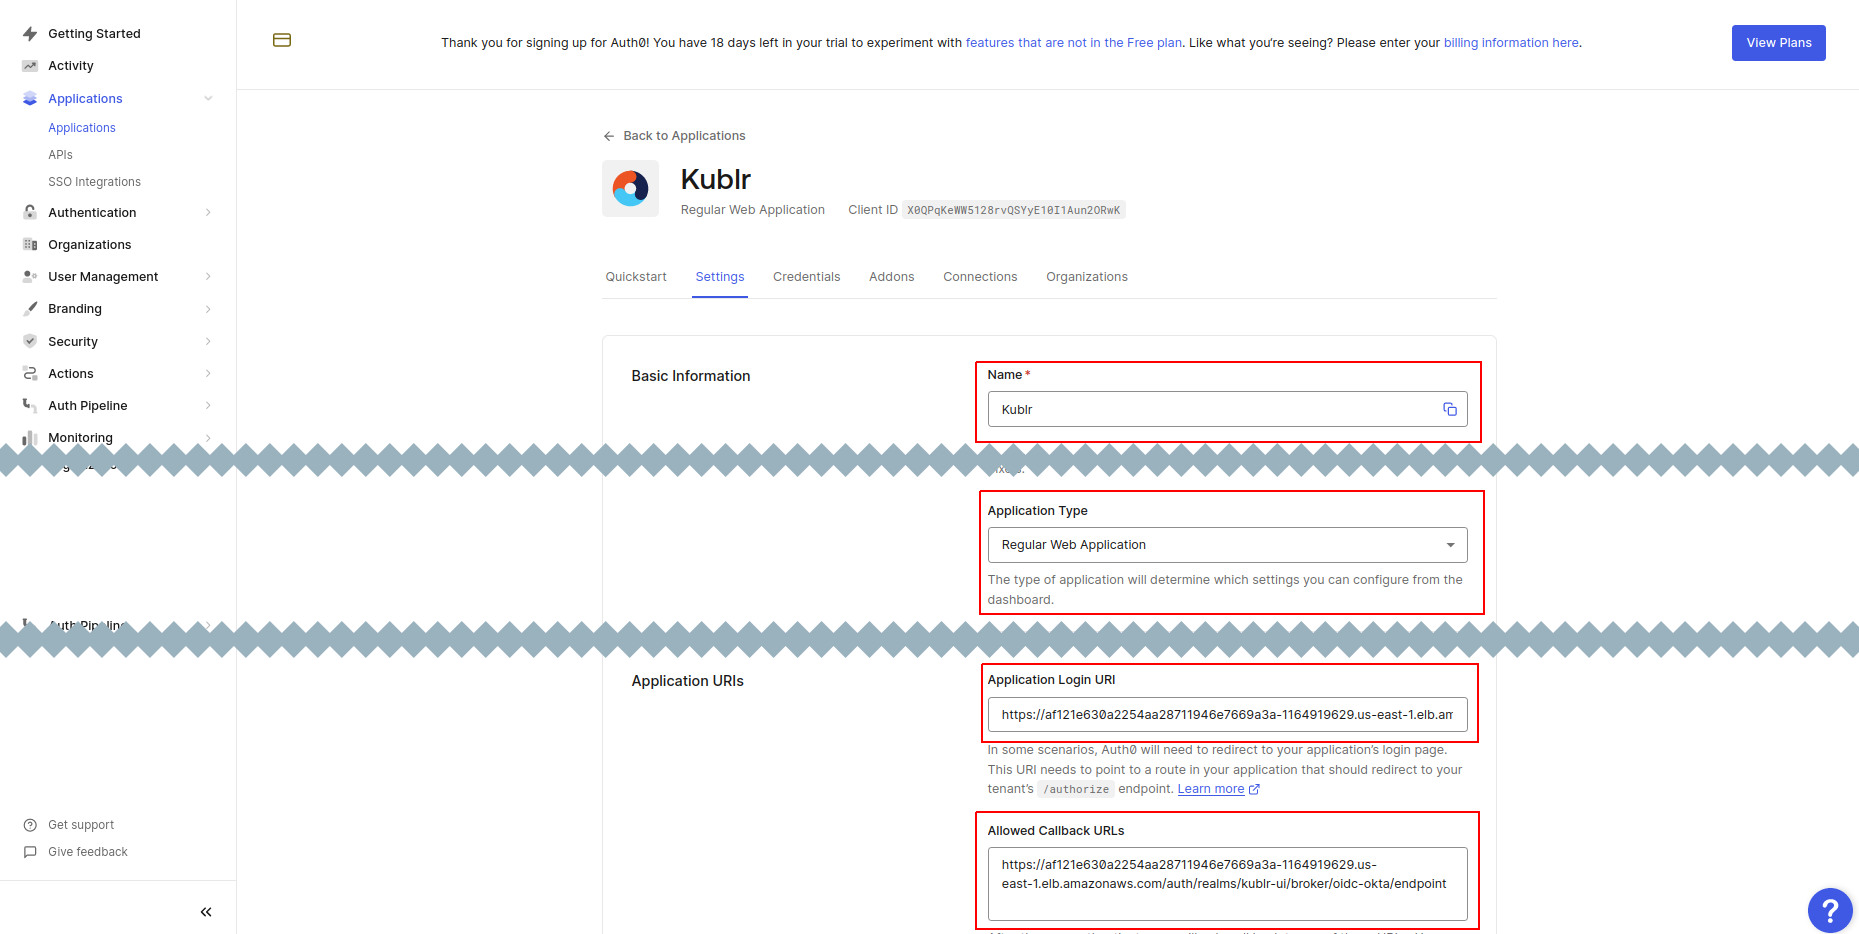
Click Create Application.
For your application, set:
Name
Application Type to “Regular Web Applications”
Application Login URI to “https://kublr-url/auth/realms/kublr-ui/broker/oidc-okta/endpoint”
Allowed Callback URLs to “https://kublr-url/auth/realms/kublr-ui/broker/oidc-okta/endpoint”
Allowed Logout URLs to “https://kublr-url/auth/realms/kublr-ui/broker/oidc-okta/endpoint/logout_response”
Allowed Web Origins to “https://kublr-url/*”
Select Allow Cross-Origin Authentication
Save changes.
Scroll down, then in Advanced Settings access the Endpoints tab.
Copy and save the OpenID Configuration endpoint.
At your application page, navigate to the Connections tab.
Make sure that the Enterprise connection is enabled.
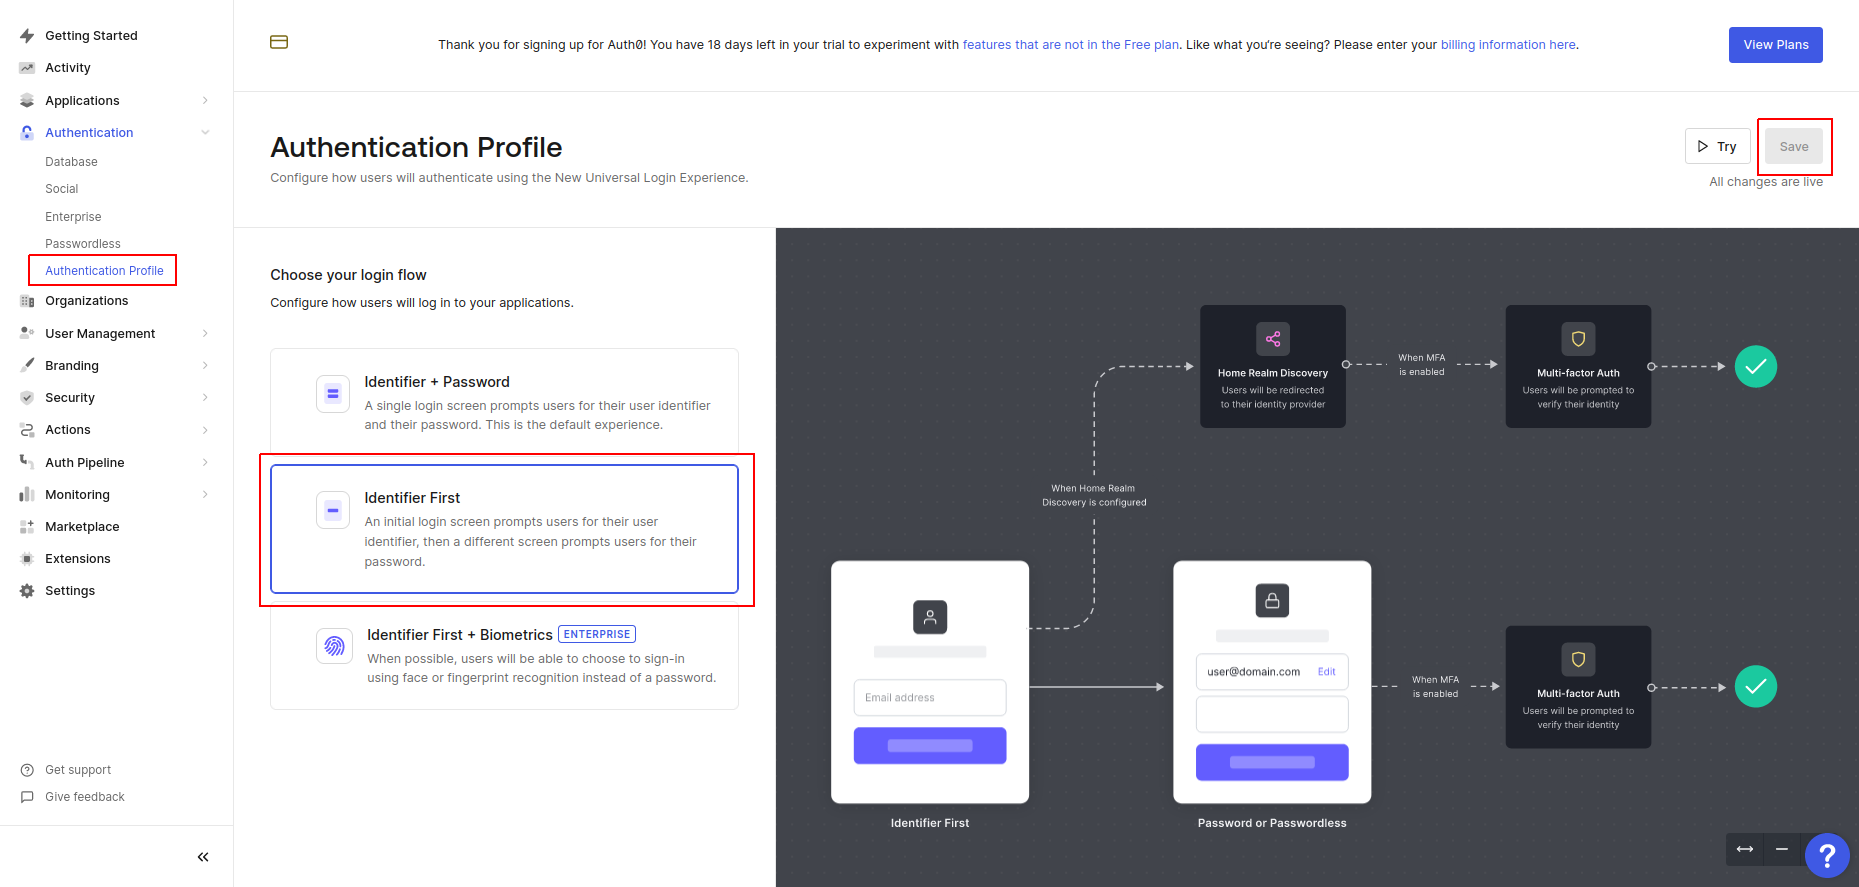
Using the left menu, access Authentication → Authentication Profile.
Select the Identifier First option.
Login to the Keycloak Admin Console at https://kublr-url/auth under admin / your admin`s password.
Select the kublr-ui realm where you want to add Azure AD as an identity provider.
Go to Identity Providers and click on the OpenID Connect v1.0. The Add OpenID Connect provider dialog is displayed.
In the Add OpenID Connect provider dialog, set:
Alias
Display name
Discovery endpoint to OpenID Configuration endpoint saved from Auth0.
Client ID to the one from Auth0 > your application > Settings tab > Basic Information
Client Secret to the one from the same Basic Information.
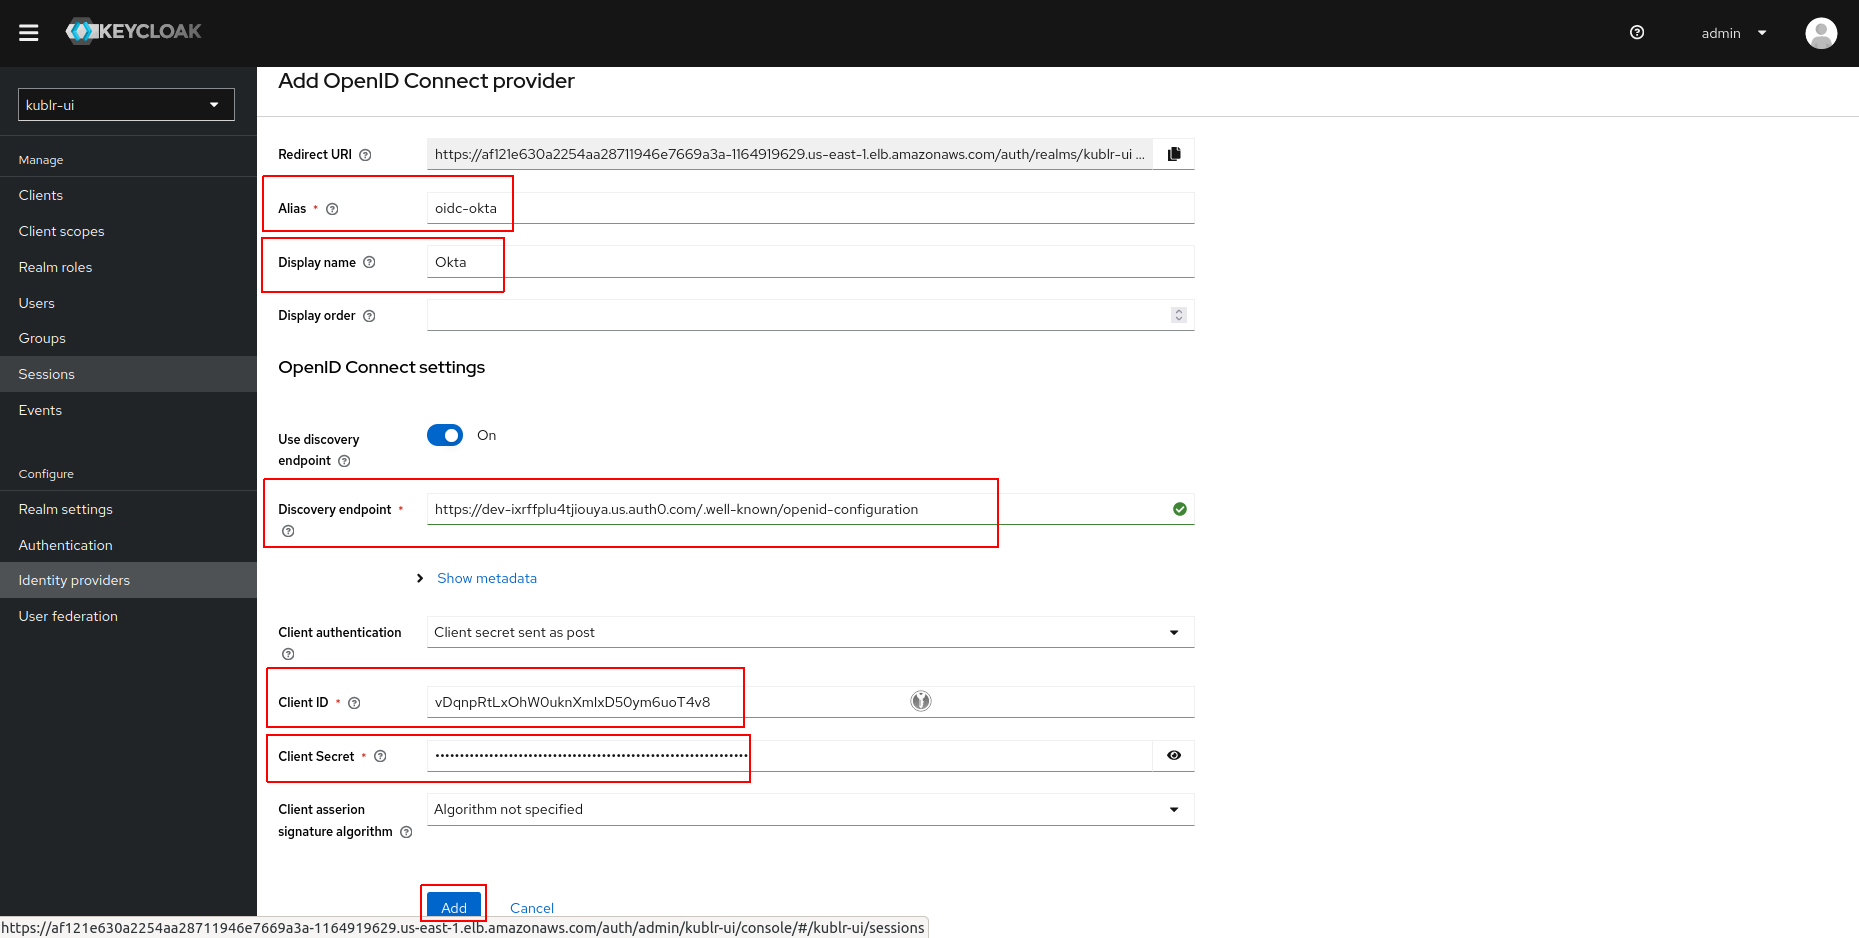
Click Add. Identity provider is created.
Access the page of the created identity provider.
Expand the Advanced section and set Scopes to “openid profile email groups”.
Click Save.
To override groups in JWT token, you need to configure user attribute mapper in Keycloak:
On the left menu, click Clients, access the Client list tab.
In the client list, click kublr-ui. The client’s page is displayed.
At the kublr-ui client page, access the Client scopes tab.
In the client scope list, click kublr-ui-dedicated.
On the Mappers tab, click Add mapper → By configuration. The Configure a new mapper dialog is displayed.
In the Configure a new mapper dialog, click User Attribute mapper type. The User Attribute mapper dialog is displayed.
In the User Attribute mapper dialog, set:
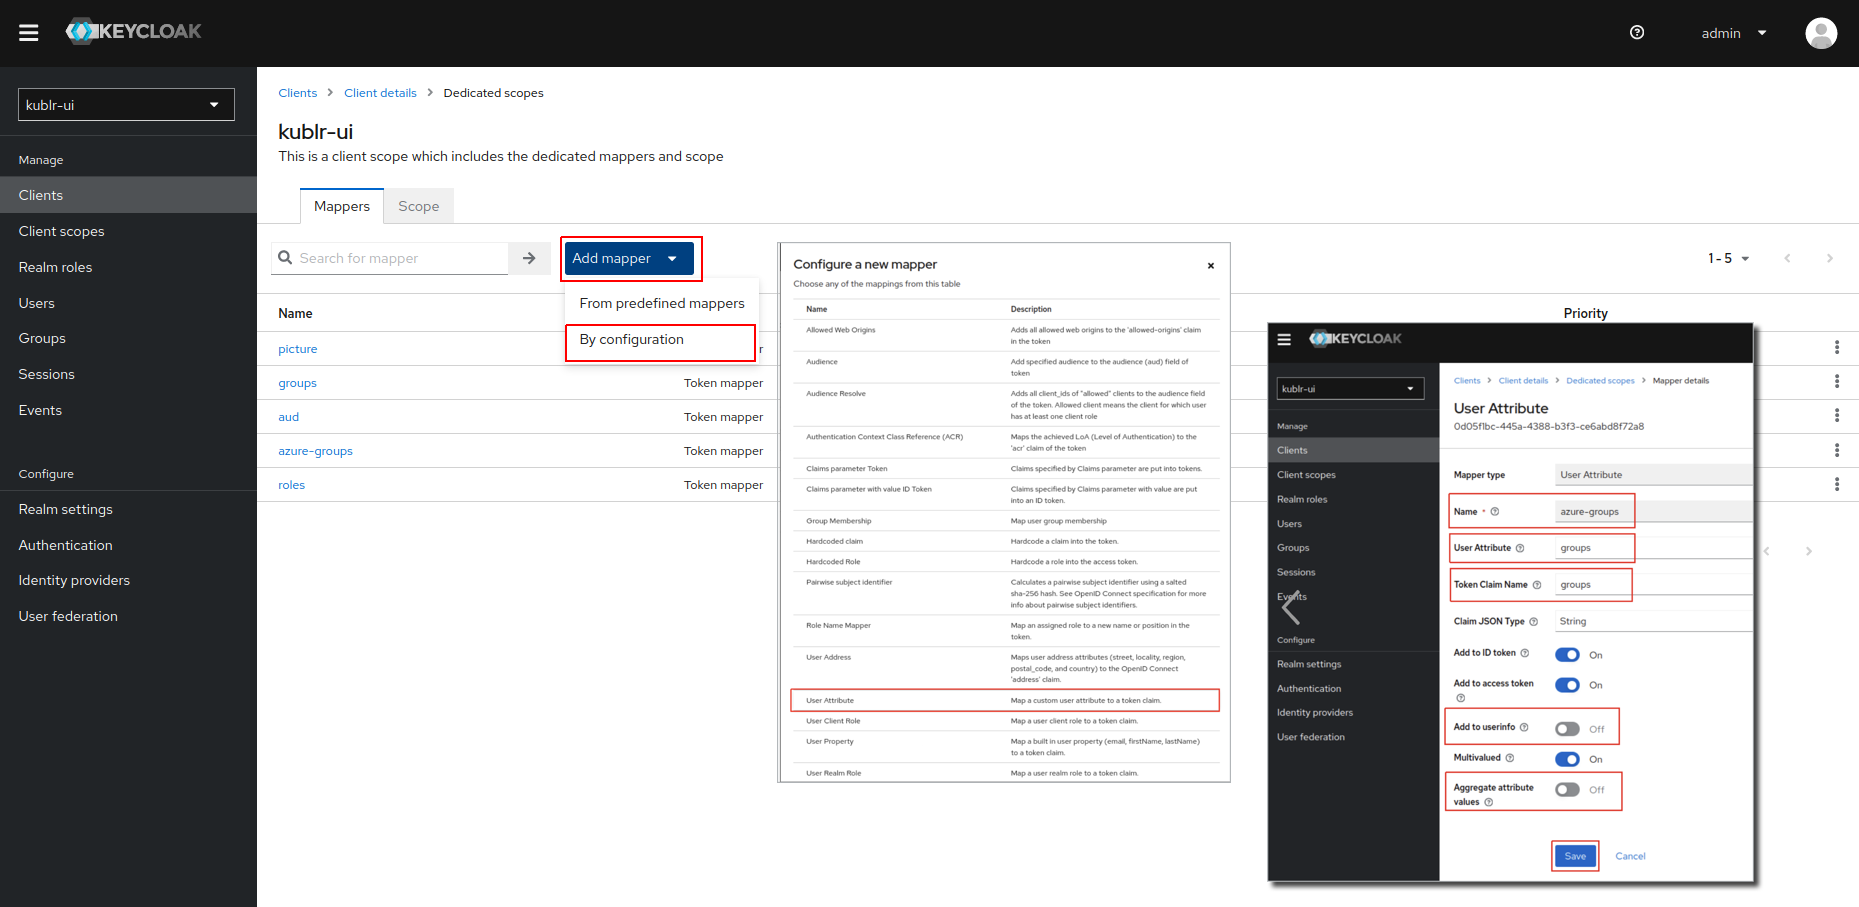
Save changes.
Navigate back to kublr-ui client → kublr-ui-dedicated client scope → Mappers tab.
Click the groups mapper, set:
Save changes.
This documentation:
