To use Kublr, you’ll need a Microsoft Azure subscription account.
To create or manage Kublr service account in Azure, it is necessary to be able to register applications, and for that you must have sufficient permissions with your Azure AD tenant.
To ensure that you have needed permissions, perform the following steps.
Log in to your Azure Account through the Azure portal.
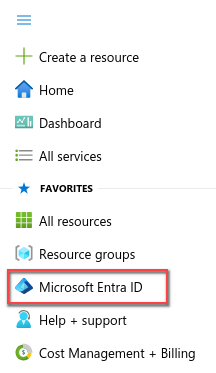
Select Microsoft Entra ID.
In Azure Active Directory, select User settings and check the App registrations setting.
If set to Yes, then non-admin users can register applications and you can proceed to the next section.
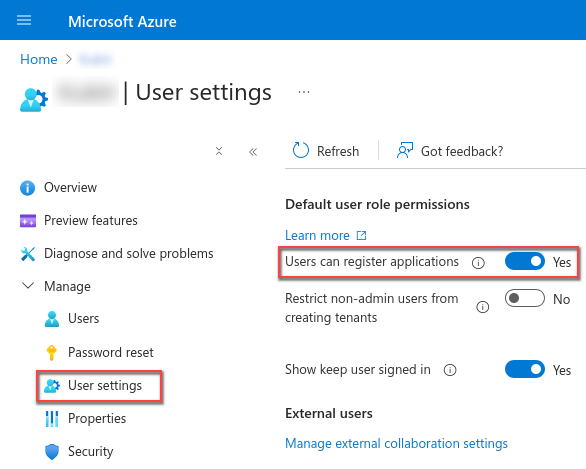
If the app registrations setting is set to No, then only admin users can register applications.
To check whether your account is an admin for the Entra ID tenant:
Navigate back to Microsoft Entra ID.
In the left panel, click Users. The All users (Preview) page is displayed.
Click the name ot your user (use Search if necessary).
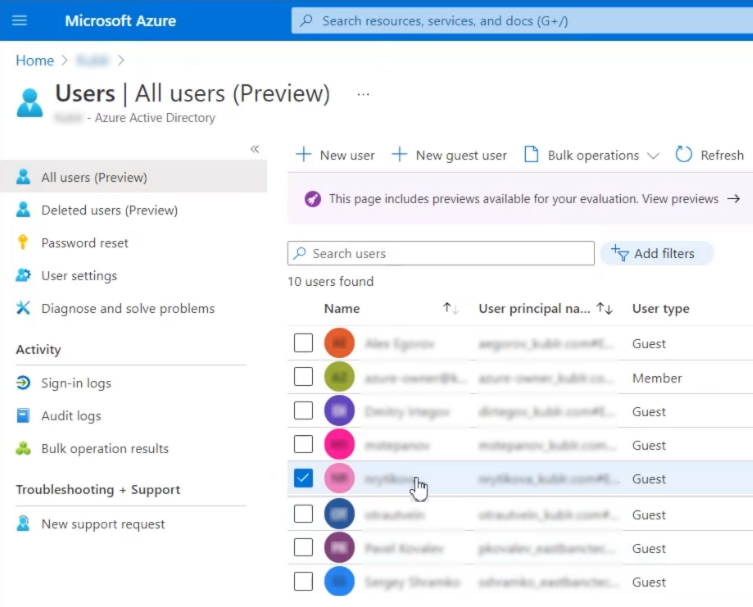
The user editing page is displayed.
Click Assigned roles.
Make sure, one of the following assingments is presented:
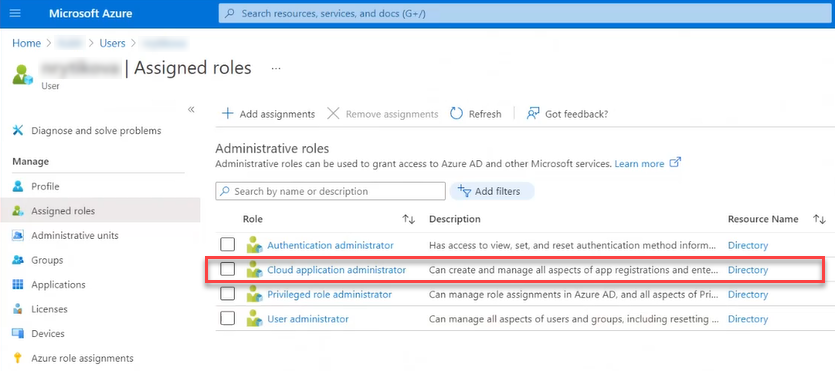
If not, add one of them.
NOTE Alternatively, you may ask your administrator to add the “register app” permission to one of your user’s presented roles.
Refer to Microsoft Azure documentation portal for more information: Check Azure subscription permissions.
In your Azure subscription, your account must have Microsoft.Authorization/Write permission to assign an AD app to a role. This action is granted through the Owner role or User Access Administrator role. If your account is assigned to the Contributor role, you do not have required permission and will receive an error when attempting to assign the service principal to a role.
To check your subscription permissions:
Navigate to Azure Active Directory.
On the left panel, click Users. The All users (Preview) page is displayed.
Click the name ot your user (use Search if necessary). The user management page is displayed.
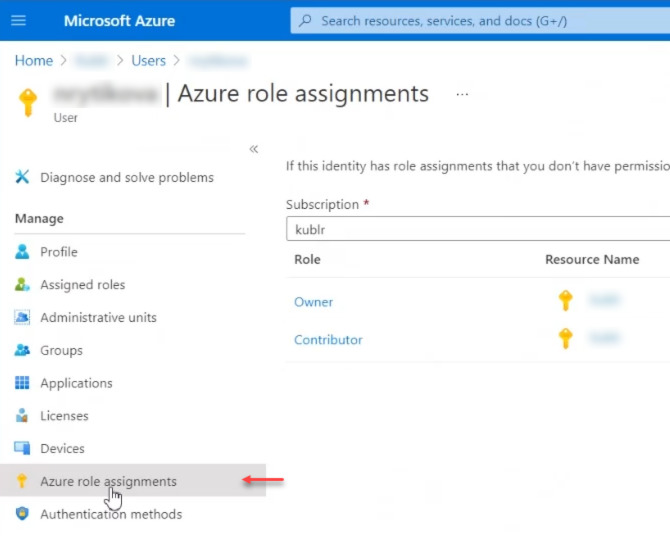
Click Azure role assignments.
View your assigned roles, and determine if you have adequate permissions to assign an AD app to a role. If not, ask your subscription administrator to assign the User Access Administrator role to you. In the following image, the user is assigned the Owner role for a subscription, which means that this user has the required permission level.
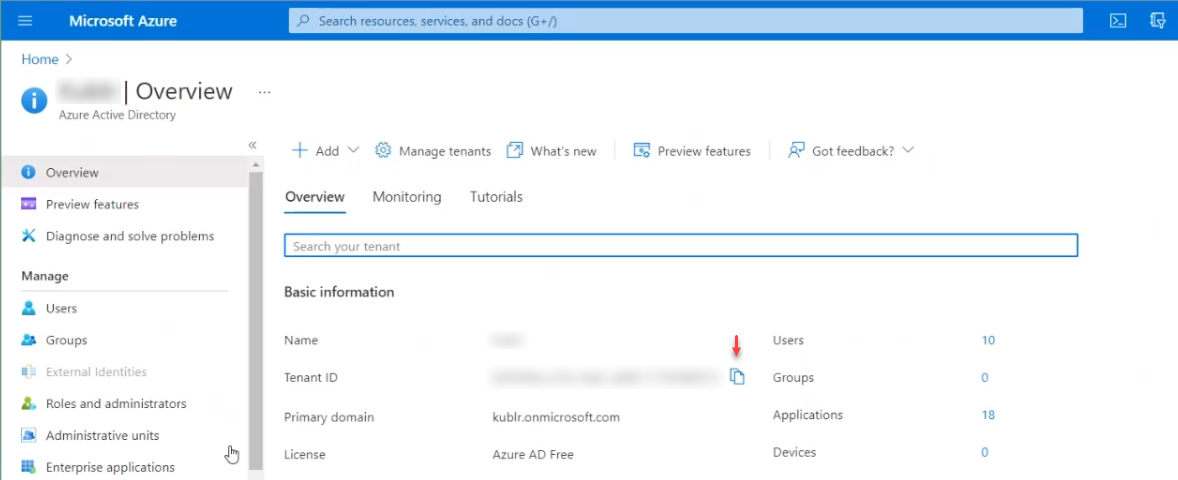
When programmatically logging in, you need to pass the tenant ID with your authentication request.
Select Microsoft Entra ID.
On the left panel, the Overview section should be selected.
From the Overview tab, copy Tenant ID.
Log in to your Azure Account through the Azure portal.
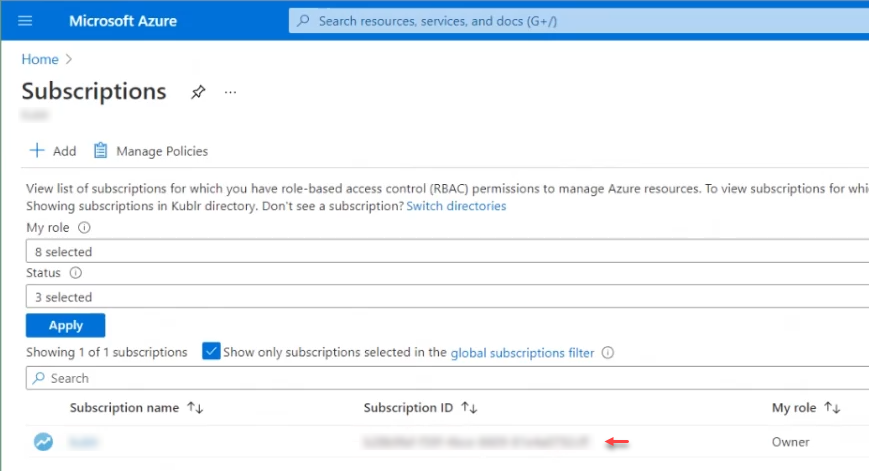
Open Subscriptions.
Copy Subscription ID.
Microsoft Entra ID Application needs to be registered to provide an Azure cloud service account that Kublr will use to create and manage cloud resources required by Kubernetes clusters.
Log in to your Azure Account through the Azure portal.
Select Microsoft Entra ID.
Select App registrations > New registration.
Set application name.
Leave Redirect URI blank or select Web/API for the type and the address of your Kublr control plane as URI.
NOTE You cannot create credentials for a Native application; therefore, that type does not work for an automated application.

Click Register. You have created your application.
To configure the service account in Kublr so that Kublr can then programmatically manage cloud resources, you will need the registered application ID and an authentication key. To get those values, use the following steps:
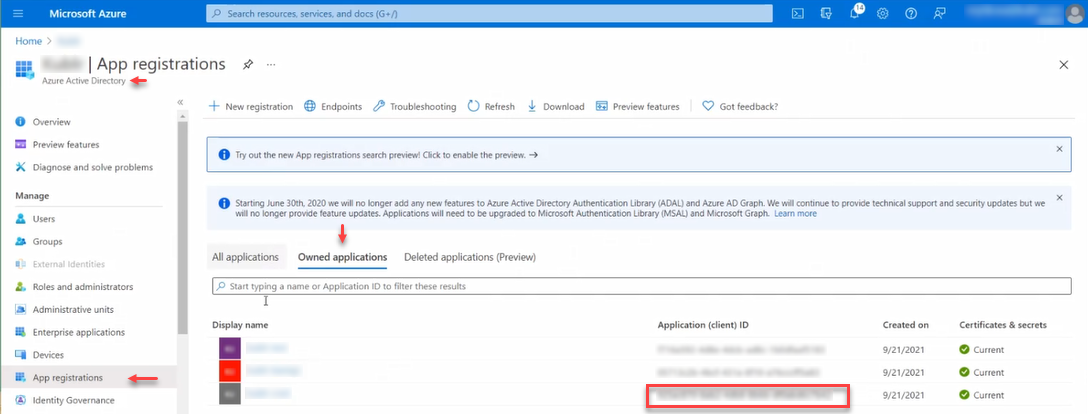
In Microsoft Entra ID, on the left panel, click App registration.
Use the Owned applications tab.
For your application, copy its Application (client) ID and store it. You will use this value as the Client ID later.
To generate an authentication key:
Go to your application page.
On the left panel, click Certificates & secrets.
In the Client secrets section, click New client secret.
Provide a description and a duration of the secret. When done, save.
In the Client secrets section, the new secret along with the value is displayed.
Copy Value now - you will not be able to retrieve it later.
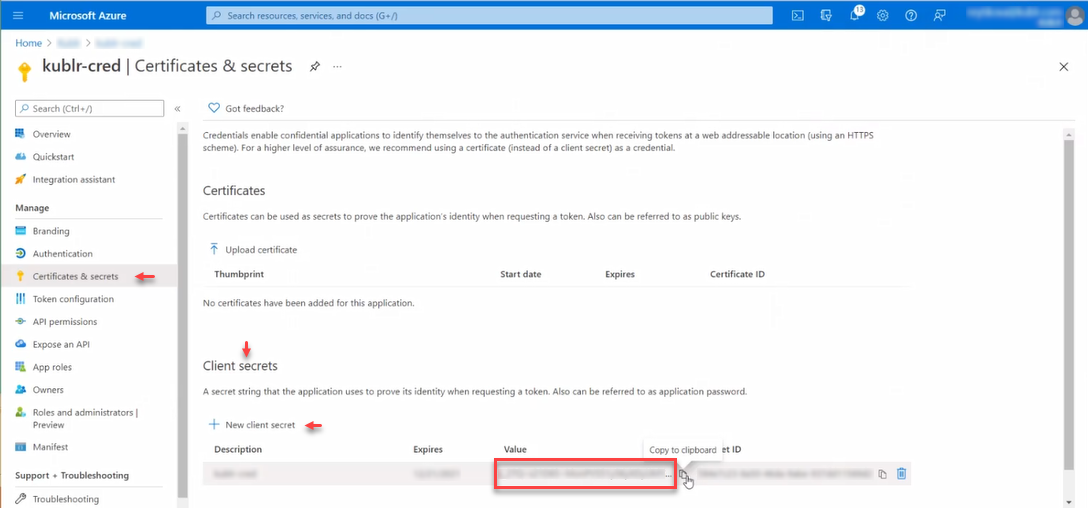
Use this value later as Client Secret.
The account Kublr will use should have necessary permissions to be able to create and manage cloud resources for Kubernetes clusters. To assign permissions to Kublr service account in Azure, you must assign the application a role. To learn about the available roles, see Azure RBAC: Built in Roles article.
Before Kublr 1.29 the required set of permissions was available in Contributor built-in role. Kublr 1.29 introduced changes in default Azure cluster architecture that impove security of Azure Kubernetes clusters, namely since Kublr 1.29 Azure clusters use managed identity by default. At the same time, becase of this change, Kublr requires additional permissions to set up Azure clusters correcly. Specifically, either User Access Manager role needs to be assigned in addition to Contributor, or the Owner role (which includes all the permissions in Contributor and User Access Manager).
Kublr 1.29 can still work without User Access Manager permissions, in which case it will show warnings when creating clusters, but will proceede creating the cluster using the legacy less secure Service Account authentication method.
Clusters created with pre-1.29 versions of Kublr will also show a worning on the next update and the user will be able to either keep them on legacy Service Account authentication method, or migrate to the newer more secure Managed Identity authentication method.
It is also possible to configure Azure clusters to use Managed Identity authentication method and provide them with pre-created managed idenitity resources so that Kublr does not need elevated credentials to manage these clusters.
For more information on various options available for Azure clusters refer to Azure Deployment Architecture document.
Roles can be assigned at different scopes - subscription, resource group, or resource - with permissions inherited at lower levels of scope. The easiest way to use Kublr with Azure is by giving it access on a subscription scope:
Navigate to Subscriptions page in Azure portal and select the subscription you want to use.
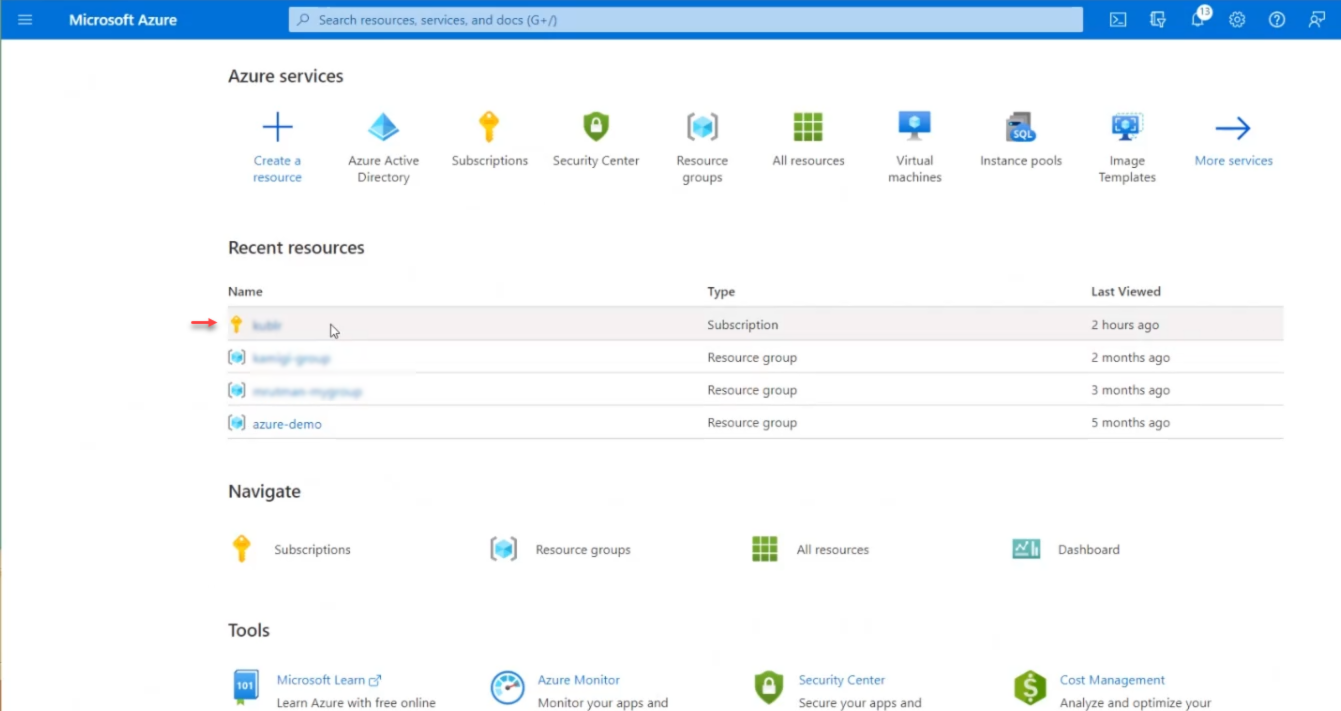
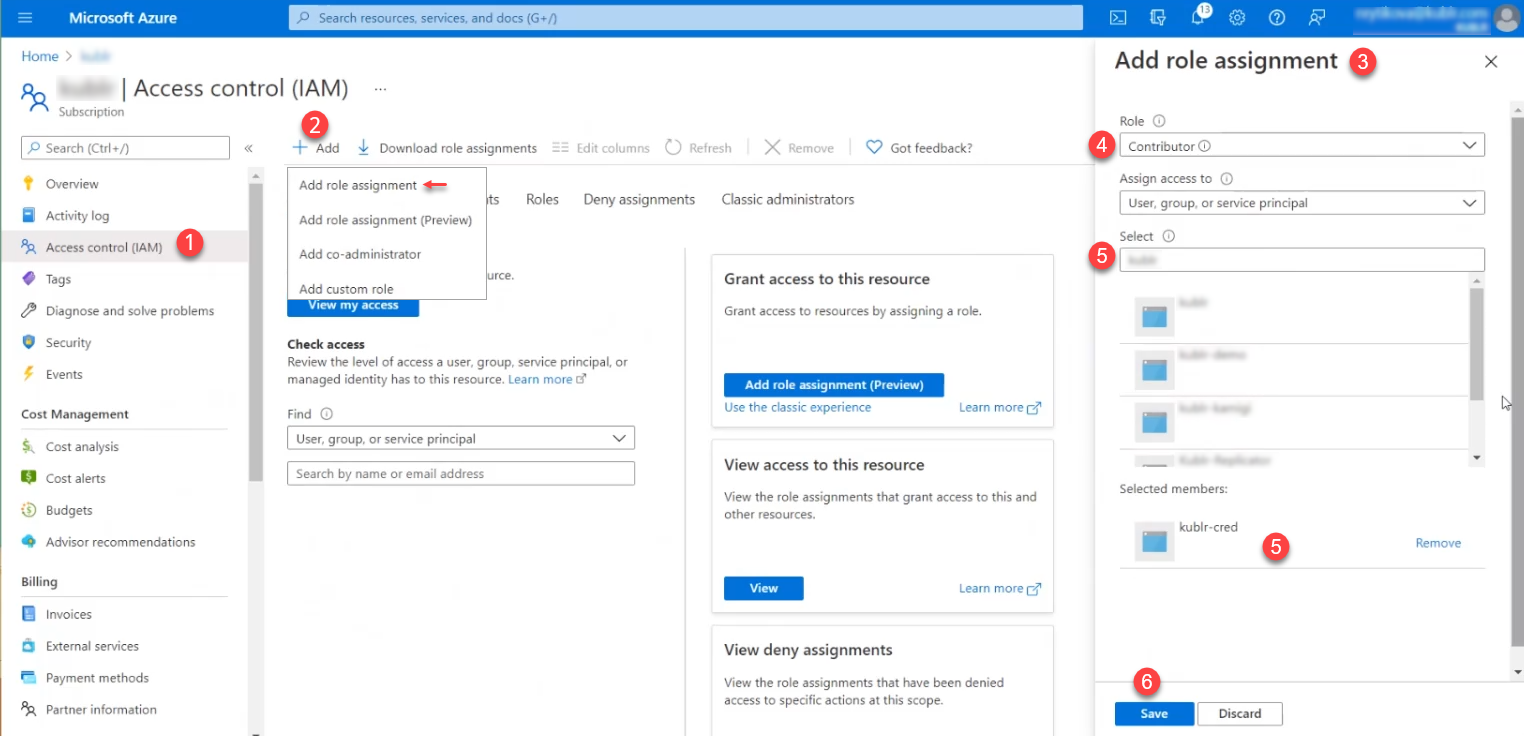
Select Access Control (IAM).
Click Add > Add role assignment. The Add role assignment panel is displayed.
In the Add role assignment panel, set Role to Owner (or use the same process to add roles Contributor and User Access Manager one by one).
Type in Select to find and select your application.
Click Save.
